If you’re looking to set up a projector screen in your office, you’re in the right place! Whether you want to enhance your presentations, create a movie night atmosphere, or improve your virtual meetings, having a projector screen can take your office space to the next level. But the question is: How do you install a projector screen the right way? In this easy guide, we’ll walk you through everything you need to know, from wall mounting to ceiling mounting, including setup tips to make the process smoother. Let’s dive in!
What Is a Projector Screen and Why Do You Need One in Your Office?
A projector screen is a specially designed surface that enhances the image quality produced by a projector. It’s used for displaying content in various settings, from business meetings to home theaters. In an office, it can serve multiple purposes such as presentations, training sessions, or video conferences. A high-quality projector screen can make your content more visible, sharp, and professional, providing a better viewing experience for everyone in the room.
When considering the installation of a projector screen in your office, there are two main options: wall mounting and ceiling mounting. Both options have their pros and cons, and your decision will largely depend on your office layout, space constraints, and aesthetic preferences. In this article, we’ll cover both methods in detail, providing you with step-by-step instructions and tips to ensure a hassle-free installation.
How to Choose the Right Projector Screen for Your Office?
Before diving into the installation process, it’s crucial to choose the right projector screen for your needs. Here are a few factors to consider:
- Screen Size: Choose a screen size that fits your space and meets your viewing requirements. Generally, the screen should be large enough for everyone in the room to see clearly, but not so large that it overwhelms the space.
- Mounting Type: As we’ll discuss later, you can choose between wall mounting or ceiling mounting. Your space and personal preference will determine the best option for you.
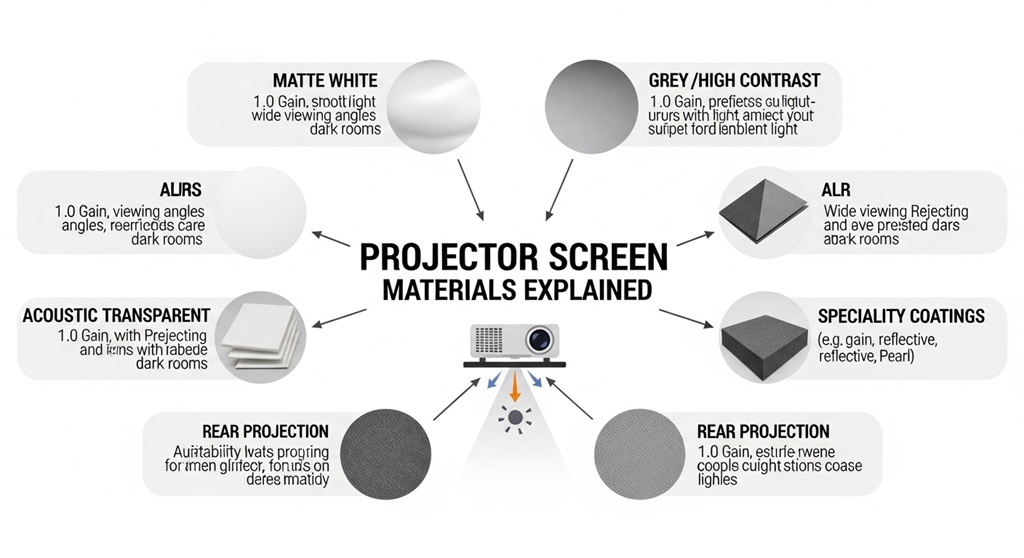
- Material: Projector screens come in different materials, including matte white, high-gain, and ambient light-rejecting screens. Each material offers different viewing experiences, so make sure to select one that suits your office’s lighting conditions.
- Aspect Ratio: The aspect ratio should match the projector you plan to use. The most common aspect ratios are 4:3, 16:9, and 16:10. For most office uses, a 16:9 aspect ratio is ideal.
Once you’ve selected the right projector screen, it’s time to move on to the installation process. Let’s take a look at how you can mount your screen in your office, whether on the wall or the ceiling.
How to Install a Projector Screen on the Wall?
Wall mounting a projector screen is one of the most popular installation methods. It’s relatively simple and offers a clean, sleek look. Here’s a step-by-step guide to help you through the process:
Step 1: Choose the Right Spot
The first step in wall mounting your projector screen is selecting the best location. You want to pick a spot that’s easily visible from anywhere in the room. Typically, this would be a wall that is opposite the seating area. Make sure there’s enough space around the screen to avoid any obstructions.
Step 2: Gather Tools and Materials
To mount your projector screen, you’ll need a few basic tools:
- Measuring tape
- Drill with wall anchors
- Level
- Screwdriver
- Stud finder (optional, but recommended)
- Projector screen mounting brackets
Step 3: Mark the Mounting Position
Use your measuring tape to mark the spot where the projector screen will be mounted. Make sure the center of the screen is at eye level when seated. Use a level to ensure the mounting position is straight.
Step 4: Install the Mounting Brackets
Most projector screens come with mounting brackets that need to be attached to the wall. If you’re mounting on drywall, use a stud finder to locate the studs behind the wall. This will ensure that your mounting brackets are secure and that the projector screen stays in place.
Drill holes into the studs or use wall anchors if necessary, then attach the brackets securely. Once the brackets are installed, double-check that they are level and aligned properly.
Step 5: Mount the Screen
With the brackets in place, it’s time to mount the projector screen. Gently lift the screen and hook it onto the mounting brackets. Depending on the model, you may need to secure the screen with screws to prevent it from shifting.
Step 6: Test the Installation
Once the projector screen is mounted, it’s time to test it. Use your projector to project an image and make sure everything aligns properly. If the screen is too high or low, you can adjust it slightly. Also, make sure the image is clear and free of distortion.
How to Install a Projector Screen on the Ceiling?
Ceiling mounting is another excellent option, especially if you have limited wall space or want to keep the screen hidden when not in use. Here’s how to install a projector screen on the ceiling:
Step 1: Choose the Best Location
When choosing a location for ceiling mounting, consider the room layout and the angle at which the projector will project. You want the projector screen to be centered in the room and aligned with the projector for optimal viewing.
Step 2: Gather Tools and Materials
The tools needed for ceiling mounting are similar to those required for wall mounting:
- Measuring tape
- Drill
- Level
- Screwdriver
- Ceiling anchors or screws (if mounting to drywall)
- Ceiling brackets or mounting kit
Step 3: Mark the Ceiling Mounting Position
Use your measuring tape to find the ideal spot for the ceiling mount. Typically, this would be near the center of the ceiling to ensure the screen is aligned with the projector. Mark the spots where the ceiling brackets will be installed.
Step 4: Install the Ceiling Brackets
Drill holes into the ceiling, ensuring that you’re drilling into ceiling studs or beams for a secure mount. If necessary, use ceiling anchors to provide extra stability. Once the holes are drilled, attach the brackets securely to the ceiling.
Step 5: Mount the Screen
With the ceiling brackets in place, it’s time to mount the projector screen. Lift the screen and hook it onto the ceiling brackets. Make sure it is centered and level. You may need to secure the screen with screws to prevent movement.
Step 6: Test the Installation
Just like with wall mounting, test the projector screen to ensure it’s working properly. Adjust as needed to get the best viewing angle and clarity.
What Are Some Tips for Setting Up a Projector Screen in Your Office?
Here are some expert setup tips to enhance your projector screen installation:
- Use a Screen with a Gain Factor: If your office has bright lighting, consider using a high-gain projector screen to improve contrast and brightness.
- Position the Projector Correctly: Ensure your projector is placed at the right distance from the screen for optimal image size and clarity.
- Control Lighting: Use adjustable blinds or curtains to control ambient light. This will enhance the projector’s performance and visibility.
- Test the Screen Regularly: After installation, regularly check the screen for any signs of wear and tear. Clean the screen occasionally to keep it in top condition.
Conclusion
Installing a projector screen in your office doesn’t have to be a daunting task. With the right tools, a bit of patience, and these simple steps, you can easily mount a projector screen on the wall or ceiling. Whether you’re upgrading your presentations, hosting meetings, or enjoying a movie night, a projector screen can significantly enhance your office experience.
If you’re ready to improve your office setup, follow the steps above and start installing your projector screen today. Don’t forget to choose the right screen and positioning for your space. Happy mounting!
FAQs
1. What is the best type of projector screen for an office?
The best projector screen for an office depends on factors like space, lighting, and projector compatibility. For most office setups, a matte white screen with a 16:9 aspect ratio works well. If your office has bright lighting, consider a high-gain or ambient light-rejecting screen.
2. How do I calculate the ideal projector screen size for my office?
The ideal projector screen size depends on the room’s size and seating arrangement. As a general rule, the screen width should be about one-third of the distance from the screen to the farthest viewer. For example, if your seating is 12 feet away, a 4-foot wide screen is ideal.
3. Can I install a projector screen without drilling holes?
Yes, some projector screens come with adhesive mounts or tension-based mounts that don’t require drilling. However, these might not be as secure as traditional wall or ceiling mounts, especially for larger screens.
4. How can I hide the projector screen when not in use?
To hide the projector screen, you can use a ceiling-mounted retractable screen. These screens can be rolled up and hidden in a casing when not in use, keeping your office space clean and tidy.
5. Is it better to wall mount or ceiling mount a projector screen?
Both wall and ceiling mounts have their benefits. Wall mounts are easier to install and are perfect for smaller spaces. Ceiling mounts are ideal for keeping the screen hidden when not in use and provide a cleaner look in larger rooms.
6. How do I ensure the projector screen is level?
Use a level tool when mounting the projector screen to ensure it is aligned properly. This will ensure that the image is displayed straight and not distorted.
7. How often should I clean my projector screen?
It’s recommended to clean your projector screen once every few months, or more often if needed. Use a soft cloth and gentle cleaning solution to avoid damaging the surface.
Read More Also: How to Sell a Business and Prepare Documents Buyers Actually Want
Find out: How to Sell a Business and Prepare Documents Buyers Actually Want