
Are you tired of fumbling through your wallet to find the right card or fiddling with cash at the checkout counter? If so, Apple Pay on your iPhone is here to rescue you from those moments of inconvenience. In this comprehensive guide, we’ll walk you through the easy steps to set up and use Apple Pay on your iPhone, and we’ll also share some handy tips and tricks to make the most of this convenient payment method.
Setting Up Apple Pay on Your iPhone
Before you can start enjoying the benefits of Apple Pay, you’ll need to set it up on your iPhone. Here’s how to do it in a few simple steps:
- Check Your iPhone Compatibility: First things first, make sure your iPhone supports Apple Pay. It works seamlessly with iPhones equipped with Face ID or Touch ID, so if you have one of these, you’re good to go.
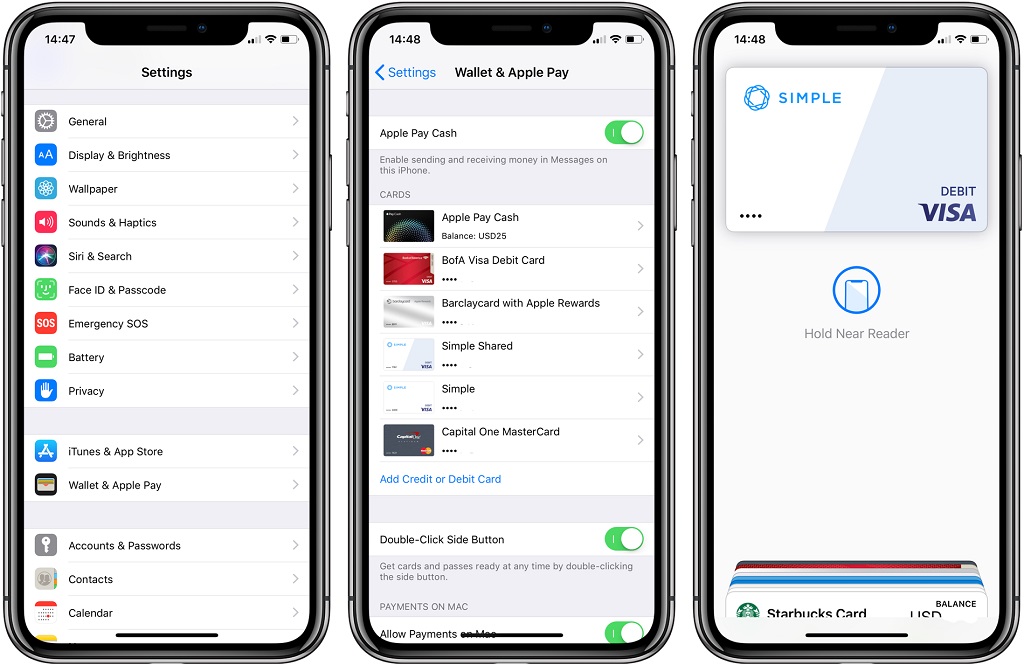
- Access the Wallet App: Open your iPhone and find the Wallet app. It’s a trusty companion when it comes to managing your cards and payments.
- Add Your Card: Once you’re in the Wallet app, tap on the plus sign (+) located in the upper-right corner. This is your gateway to adding your credit or debit card.
- Capture or Enter Card Details: You have two options here. You can either scan your card using your iPhone’s camera, which is incredibly convenient, or you can manually input your card information. Choose the method that suits you best.
- Verification Process: Follow the on-screen instructions to verify your card. This step ensures the security of your payment information.
Great job! Apple Pay has been successfully set up on your iPhone. If you’re curious about how does kibo pay work, let’s explore the different ways you can use Apple Pay in various situations.
Using Apple Pay in Stores
Imagine this: You’re at your favorite store, ready to make a purchase, and you don’t want to deal with the hassle of physical cards or cash. With Apple Pay, it’s as easy as a few taps and a glance. Here’s what you need to do:
- Activate Apple Pay: Double-click the side button on your iPhone. This action will bring up your default card and get you ready to pay.
- Authentication: To ensure your transaction’s security, you’ll either glance at your iPhone to use Face ID or enter your passcode if you have Touch ID. This step ensures that you are the rightful owner of the device.
- Complete the Payment: Hold the top of your iPhone near the contactless payment terminal at the checkout counter. Wait for a “Done” message or a checkmark to appear on your screen. That’s your signal that the payment is complete. No need to sign or hand over your card.
Using Apple Pay in Apps and Websites
Online shopping just got a whole lot easier with Apple Pay. No more entering card details or shipping addresses repeatedly. Here’s how you can use it for a smooth online checkout experience:
- Spot the Apple Pay Button: When you’re on an app or website’s checkout page, keep an eye out for the Apple Pay button. It’s usually an icon you can’t miss.
- Authentication: Once you tap the Apple Pay button, you’ll need to authenticate the transaction. This can be done through Face ID, Touch ID, or your passcode, depending on your iPhone model.
- Confirmation: After authentication, confirm your payment. Double-check the amount and shipping details to make sure everything is in order.
Apple Pay isn’t just about convenience; it’s also incredibly secure. Your card details are never shared with merchants, making it a safer way to pay online.

Bonus Tips for Using Apple Pay
Now that you know the basics of setting up and using Apple Pay, let’s explore some additional tips and tricks to make the most of this handy feature:
- Public Transportation: In some cities, Apple Pay can be used to pay for public transportation. Say goodbye to hunting for change or buying physical tickets.
- P2P Payments: Need to split a bill with friends or send money to family? Apple Pay allows you to send and receive money easily within the Messages app.
- Recurring Payments: Set up Apple Pay for recurring bills like subscriptions or utility payments. It’s a hassle-free way to ensure your payments are made on time.
- ATM Withdrawals: Some banks offer the option to withdraw cash from ATMs using Apple Pay. Check if your bank supports this feature for added convenience.
Troubleshooting and Support
If you ever run into issues while using Apple Pay, don’t worry; help is just a click away. You can visit the Apple Pay support website for assistance with any problems or questions you might have. Apple’s support resources are there to ensure you have a smooth and trouble-free experience with Apple Pay.
In conclusion, Apple Pay is a game-changer when it comes to making payments. The cell phone accessories business has embraced Apple Pay for its secure, convenient, and widely accepted payment method, ensuring a seamless experience for both in-store and online transactions. Say goodbye to carrying around bulky wallets and hello to a seamless payment experience. Happy tapping!
FAQs
- Is Apple Pay secure?
Yes, Apple Pay is highly secure. It uses advanced encryption and tokenization to protect your card information, and your actual card details are never shared with merchants.
- Can I use Apple Pay for online purchases on my iPad or Mac?
Yes, you can use Apple Pay for online purchases on your iPad or Mac as long as they are compatible with Apple Pay.
- What do I do if my iPhone doesn’t support Face ID or Touch ID?
If your iPhone doesn’t support Face ID or Touch ID, you won’t be able to use those authentication methods for Apple Pay. Instead, you’ll need to enter your passcode for transactions.
- Are there any fees associated with using Apple Pay?
Apple Pay itself is free to use. However, your bank or card issuer may have their own fees or terms associated with using Apple Pay, so it’s a good idea to check with them.
- Can I use Apple Pay internationally?
Yes, Apple Pay is accepted at millions of stores and businesses around the world. Just ensure that your bank or card issuer supports international transactions.

